
"Unveiling Secrets Low Light iPhone Photography"
Unveiling Secrets: Low Light iPhone Photography
Tips and Tricks for iPhone Low Light Photography


Ollie Mattison
Mar 27, 2024• Proven solutions
While possessing an iPhone, have you ever craved to click that awesome view just in front of you but unable to do it due to low light? Although iPhone camera embraces a sound strength and always undoubtedly satisfies you with the perfect shot, carrying out low light photography with iPhone can be a little demanding too. Your iPhone camera can’t read your mind what you wish to capture when there isn’t much light. But thankfully, there are some tips and tricks available that can be executed at the moment you want low light iPhone photography. So, let us discover those techniques and make our low light photos more interesting via this article.
Tips and Tricks for iPhone Low Light Photography
The right technique at the right time is always helpful for getting the desired results. So, we are revealing 7 useful tips here.
1. Use a slow shutter speed
When you make your mind to take photo from your iPhone in low light, make sure to slow down the shutter speed. This will help in collecting more light from the view and the more time the shutter will take to close, the more ‘light’ will it be able to gather to the sensor. Along with this, ensure to have a wide aperture so that the subject exposure will be adequate. Hence, the first tip tells you to let more light enter to the lens by slowing shutter speed for a better photo in dim light through the iPhone.
You may also like:
iPhone Night Photography Tips: Take Night Photos with iPhone >>
How to Take Long Exposure Shots on iPhone >>
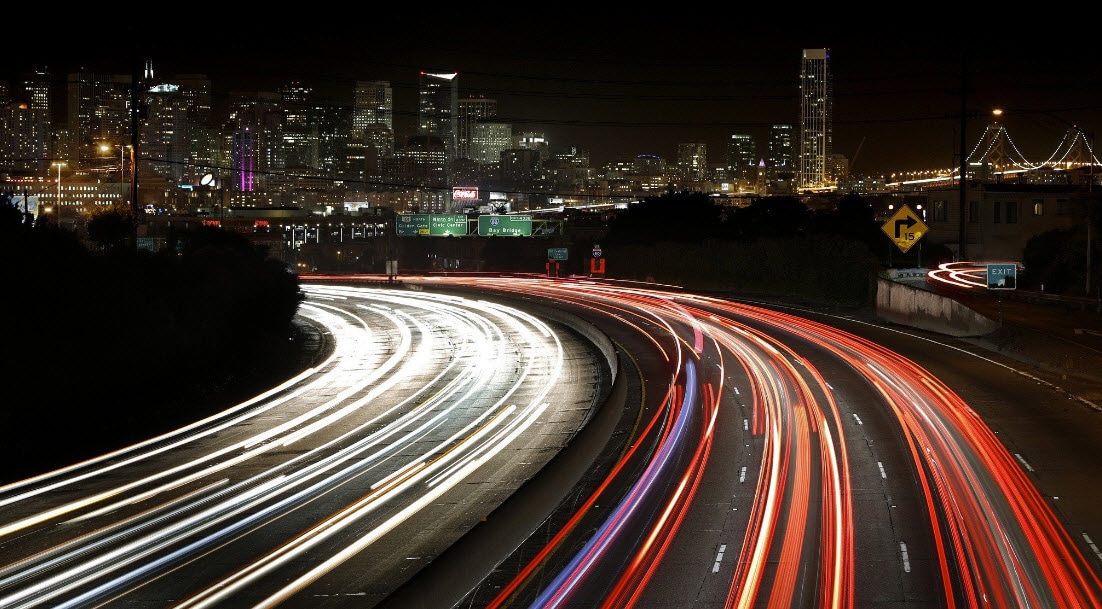
Image source: iPhone Mad
2. Stabilize your camera
When following the first tip, it is necessary to keep the camera stable to avoid any blurry or shaky image. You would not want a clumsy dim light image, right? Therefore, the next tip includes keeping your camera still and steady. You can either hold the camera tightly or place it at a stable fixed object like a tripod or door frame for support. Try this technique and you will definitely get a perfect image you want to capture even in the low light.
3. Use flash sparingly
‘Flash or no Flash’, that is the question. Well! Flash has always been there to give a better result while photographing with iPhone. Here, we would recommend you to use flash in small quantities when want to work with iPhone in dim light photography. There are times when using a flash goes pointless giving you a very undesirable results. When you wish to click a faraway subject, working with flash for low light iPhone photography can be inadequate. Also, please note that this recommendation is not for all digital cameras.
4. Don’t zoom
Contrasting the list of all the do’s for better low light photography, here is one ‘don’t’ that you must follow for having what you desire i.e. to get a perfect dim light photo with your iPhone. The rule says ‘Don’t Zoom’ while thinking about photography with your iPhone. A common photography saying goes “zoom with your feet” which means it’s better to move a little further to the subject rather than opting for zooming option. And this is indeed true for Smartphone cases since the device’s inbuilt camera contains a worthless zoom feature. You can rarely think of using digital zooming when shooting picture with your iPhone, one on five times, to be precise and that too when doing day time photography. Don’t ever think of it for low light photography as it will result in grainy look as well as reduced resolution than original. If you can’t move closer, we would suggest you cropping the picture post capturing. This will also keep the resolution intact.
5. Use HDR to get details

Image source: Gadgetzz
Another helpful tip you should know when using iPhone for low light shooting is to make use of HDR feature of the iPhone’s camera. This will help you in highlighting the details what the normal camera can miss. With the HDR feature, you will come up with the best quality low light photo detailing the exposures in an improved way. Ergo, the fifth technique that will assist you in snapping an excellent view when there is low light will be going along with HDR effect.
6. Convert to black and white
A yet another tip you can follow when having tried all above is capturing the photo in black and white. This could help you when you fail in every mentioned attempt above. Black and white will not leave you in any way. Even the grainy shots take benefit of black and white effect and seem more acceptable than in colored pictures. Sticking and adapting to ‘black and white’ is sometimes handy when you are in the mood of low light iPhone photography.

Image resource: Pexels
7. Post production
Post production, keeping the honesty, refers to doing a little cheating in order to create the low light shots non-clumsy. In other words, this technique wants to explain you to taking the desired shot at day time and adding few filters to the shot ultimately making it similar to a night time shot. For instance, by using blue or darker filters or say under-exposure, you can yourself produce a deceptive night impression. You are not new to filters and it would be not wrong to say you have worked with filters before
You may also like:
Best iPhone Phone Editing Apps for iPhone X/8/7/6 >>
Ollie Mattison
Ollie Mattison is a writer and a lover of all things video.
Follow @Ollie Mattison
Ollie Mattison
Mar 27, 2024• Proven solutions
While possessing an iPhone, have you ever craved to click that awesome view just in front of you but unable to do it due to low light? Although iPhone camera embraces a sound strength and always undoubtedly satisfies you with the perfect shot, carrying out low light photography with iPhone can be a little demanding too. Your iPhone camera can’t read your mind what you wish to capture when there isn’t much light. But thankfully, there are some tips and tricks available that can be executed at the moment you want low light iPhone photography. So, let us discover those techniques and make our low light photos more interesting via this article.
Tips and Tricks for iPhone Low Light Photography
The right technique at the right time is always helpful for getting the desired results. So, we are revealing 7 useful tips here.
1. Use a slow shutter speed
When you make your mind to take photo from your iPhone in low light, make sure to slow down the shutter speed. This will help in collecting more light from the view and the more time the shutter will take to close, the more ‘light’ will it be able to gather to the sensor. Along with this, ensure to have a wide aperture so that the subject exposure will be adequate. Hence, the first tip tells you to let more light enter to the lens by slowing shutter speed for a better photo in dim light through the iPhone.
You may also like:
iPhone Night Photography Tips: Take Night Photos with iPhone >>
How to Take Long Exposure Shots on iPhone >>
Image source: iPhone Mad
2. Stabilize your camera
When following the first tip, it is necessary to keep the camera stable to avoid any blurry or shaky image. You would not want a clumsy dim light image, right? Therefore, the next tip includes keeping your camera still and steady. You can either hold the camera tightly or place it at a stable fixed object like a tripod or door frame for support. Try this technique and you will definitely get a perfect image you want to capture even in the low light.
3. Use flash sparingly
‘Flash or no Flash’, that is the question. Well! Flash has always been there to give a better result while photographing with iPhone. Here, we would recommend you to use flash in small quantities when want to work with iPhone in dim light photography. There are times when using a flash goes pointless giving you a very undesirable results. When you wish to click a faraway subject, working with flash for low light iPhone photography can be inadequate. Also, please note that this recommendation is not for all digital cameras.
4. Don’t zoom
Contrasting the list of all the do’s for better low light photography, here is one ‘don’t’ that you must follow for having what you desire i.e. to get a perfect dim light photo with your iPhone. The rule says ‘Don’t Zoom’ while thinking about photography with your iPhone. A common photography saying goes “zoom with your feet” which means it’s better to move a little further to the subject rather than opting for zooming option. And this is indeed true for Smartphone cases since the device’s inbuilt camera contains a worthless zoom feature. You can rarely think of using digital zooming when shooting picture with your iPhone, one on five times, to be precise and that too when doing day time photography. Don’t ever think of it for low light photography as it will result in grainy look as well as reduced resolution than original. If you can’t move closer, we would suggest you cropping the picture post capturing. This will also keep the resolution intact.
5. Use HDR to get details

Image source: Gadgetzz
Another helpful tip you should know when using iPhone for low light shooting is to make use of HDR feature of the iPhone’s camera. This will help you in highlighting the details what the normal camera can miss. With the HDR feature, you will come up with the best quality low light photo detailing the exposures in an improved way. Ergo, the fifth technique that will assist you in snapping an excellent view when there is low light will be going along with HDR effect.
6. Convert to black and white
A yet another tip you can follow when having tried all above is capturing the photo in black and white. This could help you when you fail in every mentioned attempt above. Black and white will not leave you in any way. Even the grainy shots take benefit of black and white effect and seem more acceptable than in colored pictures. Sticking and adapting to ‘black and white’ is sometimes handy when you are in the mood of low light iPhone photography.

Image resource: Pexels
7. Post production
Post production, keeping the honesty, refers to doing a little cheating in order to create the low light shots non-clumsy. In other words, this technique wants to explain you to taking the desired shot at day time and adding few filters to the shot ultimately making it similar to a night time shot. For instance, by using blue or darker filters or say under-exposure, you can yourself produce a deceptive night impression. You are not new to filters and it would be not wrong to say you have worked with filters before
You may also like:
Best iPhone Phone Editing Apps for iPhone X/8/7/6 >>
Ollie Mattison
Ollie Mattison is a writer and a lover of all things video.
Follow @Ollie Mattison
Ollie Mattison
Mar 27, 2024• Proven solutions
While possessing an iPhone, have you ever craved to click that awesome view just in front of you but unable to do it due to low light? Although iPhone camera embraces a sound strength and always undoubtedly satisfies you with the perfect shot, carrying out low light photography with iPhone can be a little demanding too. Your iPhone camera can’t read your mind what you wish to capture when there isn’t much light. But thankfully, there are some tips and tricks available that can be executed at the moment you want low light iPhone photography. So, let us discover those techniques and make our low light photos more interesting via this article.
 OtsAV DJ Pro
Tips and Tricks for iPhone Low Light Photography
The right technique at the right time is always helpful for getting the desired results. So, we are revealing 7 useful tips here.
1. Use a slow shutter speed
When you make your mind to take photo from your iPhone in low light, make sure to slow down the shutter speed. This will help in collecting more light from the view and the more time the shutter will take to close, the more ‘light’ will it be able to gather to the sensor. Along with this, ensure to have a wide aperture so that the subject exposure will be adequate. Hence, the first tip tells you to let more light enter to the lens by slowing shutter speed for a better photo in dim light through the iPhone.
You may also like:
iPhone Night Photography Tips: Take Night Photos with iPhone >>
How to Take Long Exposure Shots on iPhone >>
Image source: iPhone Mad
2. Stabilize your camera
When following the first tip, it is necessary to keep the camera stable to avoid any blurry or shaky image. You would not want a clumsy dim light image, right? Therefore, the next tip includes keeping your camera still and steady. You can either hold the camera tightly or place it at a stable fixed object like a tripod or door frame for support. Try this technique and you will definitely get a perfect image you want to capture even in the low light.
3. Use flash sparingly
‘Flash or no Flash’, that is the question. Well! Flash has always been there to give a better result while photographing with iPhone. Here, we would recommend you to use flash in small quantities when want to work with iPhone in dim light photography. There are times when using a flash goes pointless giving you a very undesirable results. When you wish to click a faraway subject, working with flash for low light iPhone photography can be inadequate. Also, please note that this recommendation is not for all digital cameras.
4. Don’t zoom
Contrasting the list of all the do’s for better low light photography, here is one ‘don’t’ that you must follow for having what you desire i.e. to get a perfect dim light photo with your iPhone. The rule says ‘Don’t Zoom’ while thinking about photography with your iPhone. A common photography saying goes “zoom with your feet” which means it’s better to move a little further to the subject rather than opting for zooming option. And this is indeed true for Smartphone cases since the device’s inbuilt camera contains a worthless zoom feature. You can rarely think of using digital zooming when shooting picture with your iPhone, one on five times, to be precise and that too when doing day time photography. Don’t ever think of it for low light photography as it will result in grainy look as well as reduced resolution than original. If you can’t move closer, we would suggest you cropping the picture post capturing. This will also keep the resolution intact.
5. Use HDR to get details
Image source: Gadgetzz
Another helpful tip you should know when using iPhone for low light shooting is to make use of HDR feature of the iPhone’s camera. This will help you in highlighting the details what the normal camera can miss. With the HDR feature, you will come up with the best quality low light photo detailing the exposures in an improved way. Ergo, the fifth technique that will assist you in snapping an excellent view when there is low light will be going along with HDR effect.
6. Convert to black and white
A yet another tip you can follow when having tried all above is capturing the photo in black and white. This could help you when you fail in every mentioned attempt above. Black and white will not leave you in any way. Even the grainy shots take benefit of black and white effect and seem more acceptable than in colored pictures. Sticking and adapting to ‘black and white’ is sometimes handy when you are in the mood of low light iPhone photography.
Image resource: Pexels
7. Post production
Post production, keeping the honesty, refers to doing a little cheating in order to create the low light shots non-clumsy. In other words, this technique wants to explain you to taking the desired shot at day time and adding few filters to the shot ultimately making it similar to a night time shot. For instance, by using blue or darker filters or say under-exposure, you can yourself produce a deceptive night impression. You are not new to filters and it would be not wrong to say you have worked with filters before
You may also like:
Best iPhone Phone Editing Apps for iPhone X/8/7/6 >>
Ollie Mattison
Ollie Mattison is a writer and a lover of all things video.
Follow @Ollie Mattison
Ollie Mattison
Mar 27, 2024• Proven solutions
While possessing an iPhone, have you ever craved to click that awesome view just in front of you but unable to do it due to low light? Although iPhone camera embraces a sound strength and always undoubtedly satisfies you with the perfect shot, carrying out low light photography with iPhone can be a little demanding too. Your iPhone camera can’t read your mind what you wish to capture when there isn’t much light. But thankfully, there are some tips and tricks available that can be executed at the moment you want low light iPhone photography. So, let us discover those techniques and make our low light photos more interesting via this article.
Tips and Tricks for iPhone Low Light Photography
The right technique at the right time is always helpful for getting the desired results. So, we are revealing 7 useful tips here.
1. Use a slow shutter speed
When you make your mind to take photo from your iPhone in low light, make sure to slow down the shutter speed. This will help in collecting more light from the view and the more time the shutter will take to close, the more ‘light’ will it be able to gather to the sensor. Along with this, ensure to have a wide aperture so that the subject exposure will be adequate. Hence, the first tip tells you to let more light enter to the lens by slowing shutter speed for a better photo in dim light through the iPhone.
You may also like:
iPhone Night Photography Tips: Take Night Photos with iPhone >>
How to Take Long Exposure Shots on iPhone >>
Image source: iPhone Mad
2. Stabilize your camera
When following the first tip, it is necessary to keep the camera stable to avoid any blurry or shaky image. You would not want a clumsy dim light image, right? Therefore, the next tip includes keeping your camera still and steady. You can either hold the camera tightly or place it at a stable fixed object like a tripod or door frame for support. Try this technique and you will definitely get a perfect image you want to capture even in the low light.
3. Use flash sparingly
‘Flash or no Flash’, that is the question. Well! Flash has always been there to give a better result while photographing with iPhone. Here, we would recommend you to use flash in small quantities when want to work with iPhone in dim light photography. There are times when using a flash goes pointless giving you a very undesirable results. When you wish to click a faraway subject, working with flash for low light iPhone photography can be inadequate. Also, please note that this recommendation is not for all digital cameras.
4. Don’t zoom
Contrasting the list of all the do’s for better low light photography, here is one ‘don’t’ that you must follow for having what you desire i.e. to get a perfect dim light photo with your iPhone. The rule says ‘Don’t Zoom’ while thinking about photography with your iPhone. A common photography saying goes “zoom with your feet” which means it’s better to move a little further to the subject rather than opting for zooming option. And this is indeed true for Smartphone cases since the device’s inbuilt camera contains a worthless zoom feature. You can rarely think of using digital zooming when shooting picture with your iPhone, one on five times, to be precise and that too when doing day time photography. Don’t ever think of it for low light photography as it will result in grainy look as well as reduced resolution than original. If you can’t move closer, we would suggest you cropping the picture post capturing. This will also keep the resolution intact.
5. Use HDR to get details

Image source: Gadgetzz
Another helpful tip you should know when using iPhone for low light shooting is to make use of HDR feature of the iPhone’s camera. This will help you in highlighting the details what the normal camera can miss. With the HDR feature, you will come up with the best quality low light photo detailing the exposures in an improved way. Ergo, the fifth technique that will assist you in snapping an excellent view when there is low light will be going along with HDR effect.
6. Convert to black and white
A yet another tip you can follow when having tried all above is capturing the photo in black and white. This could help you when you fail in every mentioned attempt above. Black and white will not leave you in any way. Even the grainy shots take benefit of black and white effect and seem more acceptable than in colored pictures. Sticking and adapting to ‘black and white’ is sometimes handy when you are in the mood of low light iPhone photography.
Image resource: Pexels
7. Post production
Post production, keeping the honesty, refers to doing a little cheating in order to create the low light shots non-clumsy. In other words, this technique wants to explain you to taking the desired shot at day time and adding few filters to the shot ultimately making it similar to a night time shot. For instance, by using blue or darker filters or say under-exposure, you can yourself produce a deceptive night impression. You are not new to filters and it would be not wrong to say you have worked with filters before
You may also like:
Best iPhone Phone Editing Apps for iPhone X/8/7/6 >>
Ollie Mattison
Ollie Mattison is a writer and a lover of all things video.
Follow @Ollie Mattison
- Title: Unveiling Secrets Low Light iPhone Photography
- Author: Joseph
- Created at : 2024-07-27 08:23:39
- Updated at : 2024-07-28 08:23:39
- Link: https://extra-tips.techidaily.com/unveiling-secrets-low-light-iphone-photography/
- License: This work is licensed under CC BY-NC-SA 4.0.