
Eliminating Blurry Visuals From Streamed YouTube Content
Eliminating Blurry Visuals From Streamed YouTube Content
Create High-Quality Video - Wondershare Filmora
An easy and powerful YouTube video editor
Numerous video and audio effects to choose from
Detailed tutorials are provided by the official channel
Watching videos on YouTube can be an exhilarating experience. But YouTube video distorted issues can be annoying if you do not know how to resolve them. We’ll look at some of the things that can cause YouTube distortion and how to solve these issues.
In this article
01 What Causes YouTube Distortion?
02 How To Solve YouTube Video Distortion?
03 Extra Tips! Create Distortion Effects for Your Video with Filmora
 SwifDoo PDF Perpetual (1 PC) Free upgrade. No monthly fees ever.
What Causes YouTube Distortion?
Several things can cause Youtube social distortion. They include:
1. Poor Hardware Performance
Experiencing YouTube videos with green and distorted issues can be annoying. It can be a result of your computer having poor hardware performance. When using your computer, there will always come a point when it will behave unexpectedly and become slow. Running multiple applications on your computer can affect its speed because each application has less memory to use. The more applications run simultaneously, the slower your computer will be.
Viruses, spyware, and malware can also monitor your activity and take control of your PC, creating all kinds of complications that reduce performance.

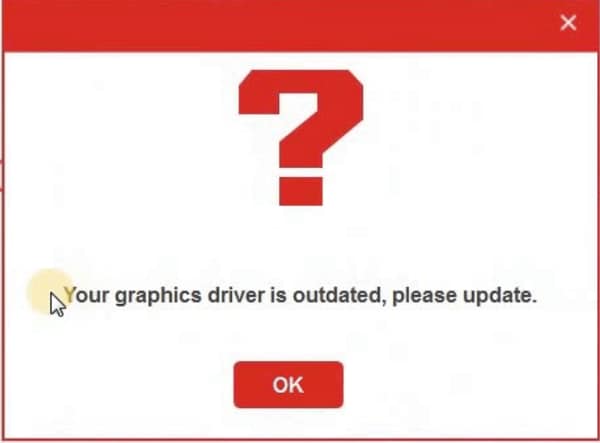
2. Outdated Graphics Drivers
Your graphics card type can also determine the performance of your computer. Graphics cards are used to perform nonvisual computations, meaning they are crucial for the general performance of your PC.
Having outdated Graphics drivers on your PC can result in many problems, including YouTube video distortion. You need a robust graphics card, a suitable driver, and GPU to have stunning graphics on your PC.
What’s more? You have to keep your graphics updated, or your computer won’t support HD visuals. Therefore, if you are experiencing YouTube social distortion, install the latest GPU driver on your PC.
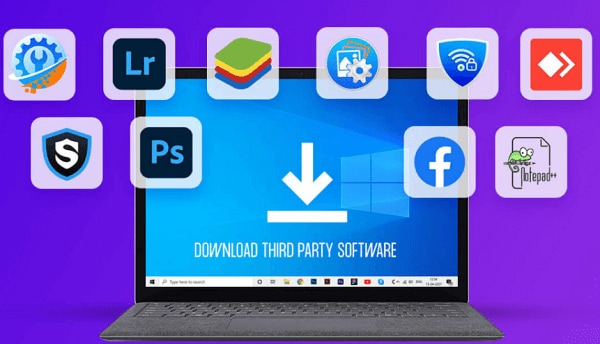
3. Unsafe Third-Party Software
There are tons of helpful and inexpensive programs on the internet, and it can be tempting to install them. But there are numerous reasons you might want to think twice before downloading and installing one. They can result in YouTube videos green and distorted problems.
In addition to third-party programs giving leeway to hackers and containing weaknesses, this software comes with other security risks. The software could have unmaintained codes, which can lead to failure to do what it’s supposed to. Its functionality and performance will be obstructed.

4. Outdated Flash
If you’ve installed an old version of Flash, it might not work well with your browser or YouTube. In turn, this can lead to YouTube videos being green and distorted.

5. Setting Video Resolution High
Setting the video resolution higher than what your video card or monitor supports can result in YouTube video distortion. If a 4K YouTube video is distorted, this means your PC is not advanced enough to do so.
How To Solve YouTube Video Distortion?
You might have noticed that the video is blurred while watching it. You shot the video with a camera with a built-in lens with a wide view, and it cannot focus perfectly. Some videos are also shot in low resolution, which is blurry. Sometimes there is also compression, which means you can’t see all the picture details. Here are ways to solve YouTube video distortion.
 /a>
/a>- Change Resolution
Resolutions measure the number of pixels used to represent an image. The higher the resolution, the more details you can see in a video. In most cases, videos are shot in 720 or 1080 pixels. High-resolution videos can also help you see small details that are not visible in low-resolution videos.
- Reinstall Flash Player
Many people use the latest version of Adobe Flash Player, and even though it is the most stable version, some people cannot see videos on YouTube; this may be because of the Flash Player. If you have updated your browser to the latest version, you will also need to update your Flash Player.
- Update Video Drivers
The best way to solve YouTube video distortion is to update your video drivers. Outdated video card drivers could be having bugs that cause your YouTube video distorted. Depending on your card’s brand, download the updates to your computer’s video card.
 Glarysoft File Recovery Pro Annually - Helps to recover your lost file/data, even permanently deleted data.
Disable Hardware Acceleration
To solve YouTube social distortion, you may need to disable hardware acceleration. To do so, you need to go to the YouTube settings of that particular video. On the enable hardware acceleration tab, click close. Next, refresh your page and watch the video. Your video card needs replacing if this fixes the problem. In the meantime, you can watch YouTube videos without hardware acceleration.
Extra Tips! Create Distortion Effects for Your Video with Filmora
As one of the most popular video editing software on the market, Filmora comes with a distortion tool with multiple effects that can make your YouTube video stand out and get more views. You can use the tool to change the behavior and shape of a layer. Let’s take a look at some of these distortion effects.
Heat Distortion Effect
The Heat distortion effect simulates realistic heat waves, and it features controls for amount, speed, direction, intensity, and much more.
- Distort Single Axis: This option will apply the heat distortion effect in a single direction. You can also specify the angle with the Distortion Rotation setting.
- Distortion Rotation: With this setting, you can change the direction of the distortion.
- Scale: The Scale option allows you to set the scale of the distortion.
- Diffusion Strength: You can adjust the blur intensity with this setting.
- Diffusion Bias: High values of the Diffusion Bias makes the blur more prevalent.
- Distortion: This option allows you to set the heat distortion strength on a layer.
 CollageIt Pro
Bulge Effect
This effect wraps your image around a specific point, creating an illusion of a bulging shape that’s through the layer. Essentially, the Bulge effect makes your image appear to sink away from viewers or protrude outwards. The depth and size of the bulge depend on the selected options. There are numerous bulge shapes to choose from, and they include:
- Bulge: Here, low values pinch the image, while high values stretch the image.
- Center: The center shape moves the bulge focal point around the image frame.
- Plateau: This option generates a flat area but without distortion in the middle of the bulge.
- Radius: The radius option allows you to adjust how big or small the distorted area will be.
- Shape: You can change the shape of the bulge with this option.
- Scale X/Y: With the Scale X/Y, you can alter the bulge ratio along the vertical and horizontal axes. You can stretch or pinch the bulge in a specified direction.
- Wrap: Wrap lets you determine the distortion level at the edges of the frame or layer.
Heat Distortion Animation
You can make the Heat distortion effect look more realistic by adding the haze effect or animation. Users can control heat distortion animation movement with the following settings:
- Wind Speed: With this setting, you can alter the intensity and speed of movement along the haze effect direction.
- Noise Speed: This setting changes the speed of the heat noise and the haze effect shape.
- Wind Direction: With the Wind Direction setting, you can adjust the haze effect direction.
Magnify Effect
You can use this effect to zoom in on a certain area of a layer; the Magnify Effect causes the illusion of a lens put over part of an image. You can use this effect to magnify the whole image several times its original size without losing resolution. Essentially, you can change the focal point, size, and shape of this distortion effect.
Insect Vision Effect
This effect produces a honeycomb lens pattern. You can use the Iris Bulge setting to add a bulge effect in the cells. What’s more? You can change the size of each cell.
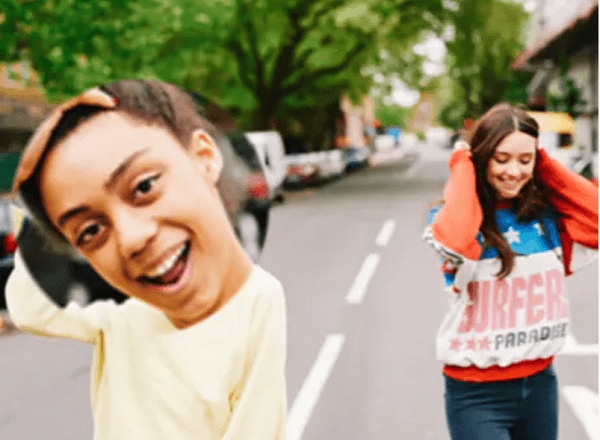
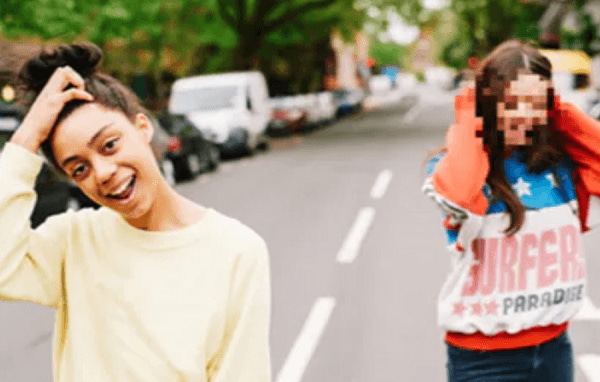
Witness Protection Effect
The Witness Protection effect allows you to obscure a certain area within the image. You can use this effect to hide serial numbers, watermarks, faces, and text that contains sensitive information.

Mosaic Effect
This effect splits a layer into solid-colored blocks and creates pixelation. You can use the Mosaic effect to conceal text or faces or create the illusion of an image with low resolution. The Vertical Blocks setting allows you to adjust the number of blocks each column has, while the Horizontal Blocks lets you set how many blocks will appear in each row.
How to Create Distortion Effects Using Filmora
Creating distortion effects for your video using Filmora is a walk in the park. You only need to follow the steps below:
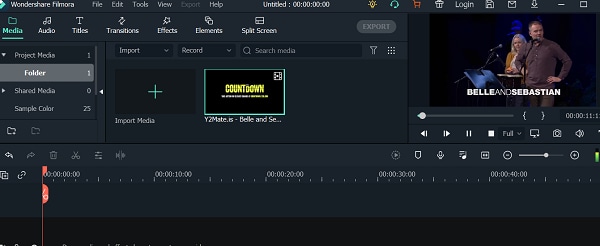
• Import your video to Filmora’s Timeline.
 Lyric Video Creator Professional Version
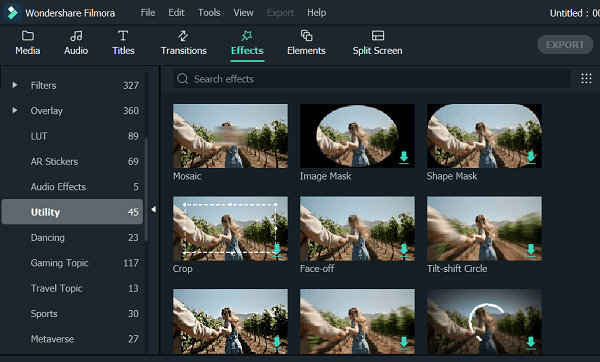
• Go to the section of the top toolbar and click on Effects. You’ll see a list of effects on the left sidebar of your screen. Choose the one you want and click on it to apply the effect to your footage.
• You can adjust the effect to suit your preference.
Conclusion
● YouTube video distorted issues can result from several factors, including PC performance, outdated drivers, and installing unsafe third-party on your PC. You can use video distortion to make your videos stand out or conceal images or text in your video. Filmora allows you to create distortion effects in your video with just a few clicks.
Watching videos on YouTube can be an exhilarating experience. But YouTube video distorted issues can be annoying if you do not know how to resolve them. We’ll look at some of the things that can cause YouTube distortion and how to solve these issues.
In this article
01 What Causes YouTube Distortion?
02 How To Solve YouTube Video Distortion?
03 Extra Tips! Create Distortion Effects for Your Video with Filmora
## What Causes YouTube Distortion?Several things can cause Youtube social distortion. They include:
1. Poor Hardware Performance
Experiencing YouTube videos with green and distorted issues can be annoying. It can be a result of your computer having poor hardware performance. When using your computer, there will always come a point when it will behave unexpectedly and become slow. Running multiple applications on your computer can affect its speed because each application has less memory to use. The more applications run simultaneously, the slower your computer will be.
Viruses, spyware, and malware can also monitor your activity and take control of your PC, creating all kinds of complications that reduce performance.
2. Outdated Graphics Drivers
Your graphics card type can also determine the performance of your computer. Graphics cards are used to perform nonvisual computations, meaning they are crucial for the general performance of your PC.
Having outdated Graphics drivers on your PC can result in many problems, including YouTube video distortion. You need a robust graphics card, a suitable driver, and GPU to have stunning graphics on your PC.
What’s more? You have to keep your graphics updated, or your computer won’t support HD visuals. Therefore, if you are experiencing YouTube social distortion, install the latest GPU driver on your PC.
 Power Tools add-on for Google Sheets, 12-month subscription
3. Unsafe Third-Party Software
There are tons of helpful and inexpensive programs on the internet, and it can be tempting to install them. But there are numerous reasons you might want to think twice before downloading and installing one. They can result in YouTube videos green and distorted problems.
In addition to third-party programs giving leeway to hackers and containing weaknesses, this software comes with other security risks. The software could have unmaintained codes, which can lead to failure to do what it’s supposed to. Its functionality and performance will be obstructed.
 Project Manager - Asset Browser for 3Ds Max
4. Outdated Flash
If you’ve installed an old version of Flash, it might not work well with your browser or YouTube. In turn, this can lead to YouTube videos being green and distorted.

5. Setting Video Resolution High
Setting the video resolution higher than what your video card or monitor supports can result in YouTube video distortion. If a 4K YouTube video is distorted, this means your PC is not advanced enough to do so.
How To Solve YouTube Video Distortion?
You might have noticed that the video is blurred while watching it. You shot the video with a camera with a built-in lens with a wide view, and it cannot focus perfectly. Some videos are also shot in low resolution, which is blurry. Sometimes there is also compression, which means you can’t see all the picture details. Here are ways to solve YouTube video distortion.
- Change Resolution
Resolutions measure the number of pixels used to represent an image. The higher the resolution, the more details you can see in a video. In most cases, videos are shot in 720 or 1080 pixels. High-resolution videos can also help you see small details that are not visible in low-resolution videos.
- Reinstall Flash Player
Many people use the latest version of Adobe Flash Player, and even though it is the most stable version, some people cannot see videos on YouTube; this may be because of the Flash Player. If you have updated your browser to the latest version, you will also need to update your Flash Player.
- Update Video Drivers
The best way to solve YouTube video distortion is to update your video drivers. Outdated video card drivers could be having bugs that cause your YouTube video distorted. Depending on your card’s brand, download the updates to your computer’s video card.
Disable Hardware Acceleration
To solve YouTube social distortion, you may need to disable hardware acceleration. To do so, you need to go to the YouTube settings of that particular video. On the enable hardware acceleration tab, click close. Next, refresh your page and watch the video. Your video card needs replacing if this fixes the problem. In the meantime, you can watch YouTube videos without hardware acceleration.
Extra Tips! Create Distortion Effects for Your Video with Filmora
As one of the most popular video editing software on the market, Filmora comes with a distortion tool with multiple effects that can make your YouTube video stand out and get more views. You can use the tool to change the behavior and shape of a layer. Let’s take a look at some of these distortion effects.
Heat Distortion Effect
The Heat distortion effect simulates realistic heat waves, and it features controls for amount, speed, direction, intensity, and much more.
- Distort Single Axis: This option will apply the heat distortion effect in a single direction. You can also specify the angle with the Distortion Rotation setting.
- Distortion Rotation: With this setting, you can change the direction of the distortion.
- Scale: The Scale option allows you to set the scale of the distortion.
- Diffusion Strength: You can adjust the blur intensity with this setting.
- Diffusion Bias: High values of the Diffusion Bias makes the blur more prevalent.
- Distortion: This option allows you to set the heat distortion strength on a layer.
Bulge Effect
This effect wraps your image around a specific point, creating an illusion of a bulging shape that’s through the layer. Essentially, the Bulge effect makes your image appear to sink away from viewers or protrude outwards. The depth and size of the bulge depend on the selected options. There are numerous bulge shapes to choose from, and they include:
- Bulge: Here, low values pinch the image, while high values stretch the image.
- Center: The center shape moves the bulge focal point around the image frame.
- Plateau: This option generates a flat area but without distortion in the middle of the bulge.
- Radius: The radius option allows you to adjust how big or small the distorted area will be.
- Shape: You can change the shape of the bulge with this option.
- Scale X/Y: With the Scale X/Y, you can alter the bulge ratio along the vertical and horizontal axes. You can stretch or pinch the bulge in a specified direction.
- Wrap: Wrap lets you determine the distortion level at the edges of the frame or layer.
Heat Distortion Animation
You can make the Heat distortion effect look more realistic by adding the haze effect or animation. Users can control heat distortion animation movement with the following settings:
- Wind Speed: With this setting, you can alter the intensity and speed of movement along the haze effect direction.
- Noise Speed: This setting changes the speed of the heat noise and the haze effect shape.
- Wind Direction: With the Wind Direction setting, you can adjust the haze effect direction.
Magnify Effect
You can use this effect to zoom in on a certain area of a layer; the Magnify Effect causes the illusion of a lens put over part of an image. You can use this effect to magnify the whole image several times its original size without losing resolution. Essentially, you can change the focal point, size, and shape of this distortion effect.
Insect Vision Effect
This effect produces a honeycomb lens pattern. You can use the Iris Bulge setting to add a bulge effect in the cells. What’s more? You can change the size of each cell.
Witness Protection Effect
The Witness Protection effect allows you to obscure a certain area within the image. You can use this effect to hide serial numbers, watermarks, faces, and text that contains sensitive information.
Mosaic Effect
This effect splits a layer into solid-colored blocks and creates pixelation. You can use the Mosaic effect to conceal text or faces or create the illusion of an image with low resolution. The Vertical Blocks setting allows you to adjust the number of blocks each column has, while the Horizontal Blocks lets you set how many blocks will appear in each row.

How to Create Distortion Effects Using Filmora
Creating distortion effects for your video using Filmora is a walk in the park. You only need to follow the steps below:
• Import your video to Filmora’s Timeline.
• Go to the section of the top toolbar and click on Effects. You’ll see a list of effects on the left sidebar of your screen. Choose the one you want and click on it to apply the effect to your footage.
• You can adjust the effect to suit your preference.
Conclusion
● YouTube video distorted issues can result from several factors, including PC performance, outdated drivers, and installing unsafe third-party on your PC. You can use video distortion to make your videos stand out or conceal images or text in your video. Filmora allows you to create distortion effects in your video with just a few clicks.
Watching videos on YouTube can be an exhilarating experience. But YouTube video distorted issues can be annoying if you do not know how to resolve them. We’ll look at some of the things that can cause YouTube distortion and how to solve these issues.
In this article
01 What Causes YouTube Distortion?
02 How To Solve YouTube Video Distortion?
03 Extra Tips! Create Distortion Effects for Your Video with Filmora
What Causes YouTube Distortion?
Several things can cause Youtube social distortion. They include:

1. Poor Hardware Performance
Experiencing YouTube videos with green and distorted issues can be annoying. It can be a result of your computer having poor hardware performance. When using your computer, there will always come a point when it will behave unexpectedly and become slow. Running multiple applications on your computer can affect its speed because each application has less memory to use. The more applications run simultaneously, the slower your computer will be.
Viruses, spyware, and malware can also monitor your activity and take control of your PC, creating all kinds of complications that reduce performance.
2. Outdated Graphics Drivers
Your graphics card type can also determine the performance of your computer. Graphics cards are used to perform nonvisual computations, meaning they are crucial for the general performance of your PC.
Having outdated Graphics drivers on your PC can result in many problems, including YouTube video distortion. You need a robust graphics card, a suitable driver, and GPU to have stunning graphics on your PC.
What’s more? You have to keep your graphics updated, or your computer won’t support HD visuals. Therefore, if you are experiencing YouTube social distortion, install the latest GPU driver on your PC.
3. Unsafe Third-Party Software
There are tons of helpful and inexpensive programs on the internet, and it can be tempting to install them. But there are numerous reasons you might want to think twice before downloading and installing one. They can result in YouTube videos green and distorted problems.
In addition to third-party programs giving leeway to hackers and containing weaknesses, this software comes with other security risks. The software could have unmaintained codes, which can lead to failure to do what it’s supposed to. Its functionality and performance will be obstructed.
4. Outdated Flash
If you’ve installed an old version of Flash, it might not work well with your browser or YouTube. In turn, this can lead to YouTube videos being green and distorted.
5. Setting Video Resolution High
Setting the video resolution higher than what your video card or monitor supports can result in YouTube video distortion. If a 4K YouTube video is distorted, this means your PC is not advanced enough to do so.
How To Solve YouTube Video Distortion?
You might have noticed that the video is blurred while watching it. You shot the video with a camera with a built-in lens with a wide view, and it cannot focus perfectly. Some videos are also shot in low resolution, which is blurry. Sometimes there is also compression, which means you can’t see all the picture details. Here are ways to solve YouTube video distortion.
- Change Resolution
Resolutions measure the number of pixels used to represent an image. The higher the resolution, the more details you can see in a video. In most cases, videos are shot in 720 or 1080 pixels. High-resolution videos can also help you see small details that are not visible in low-resolution videos.
- Reinstall Flash Player
Many people use the latest version of Adobe Flash Player, and even though it is the most stable version, some people cannot see videos on YouTube; this may be because of the Flash Player. If you have updated your browser to the latest version, you will also need to update your Flash Player.
- Update Video Drivers
The best way to solve YouTube video distortion is to update your video drivers. Outdated video card drivers could be having bugs that cause your YouTube video distorted. Depending on your card’s brand, download the updates to your computer’s video card.

Disable Hardware Acceleration
To solve YouTube social distortion, you may need to disable hardware acceleration. To do so, you need to go to the YouTube settings of that particular video. On the enable hardware acceleration tab, click close. Next, refresh your page and watch the video. Your video card needs replacing if this fixes the problem. In the meantime, you can watch YouTube videos without hardware acceleration.
Extra Tips! Create Distortion Effects for Your Video with Filmora
As one of the most popular video editing software on the market, Filmora comes with a distortion tool with multiple effects that can make your YouTube video stand out and get more views. You can use the tool to change the behavior and shape of a layer. Let’s take a look at some of these distortion effects.
Heat Distortion Effect
The Heat distortion effect simulates realistic heat waves, and it features controls for amount, speed, direction, intensity, and much more.
- Distort Single Axis: This option will apply the heat distortion effect in a single direction. You can also specify the angle with the Distortion Rotation setting.
- Distortion Rotation: With this setting, you can change the direction of the distortion.
- Scale: The Scale option allows you to set the scale of the distortion.
- Diffusion Strength: You can adjust the blur intensity with this setting.
- Diffusion Bias: High values of the Diffusion Bias makes the blur more prevalent.
- Distortion: This option allows you to set the heat distortion strength on a layer.
Bulge Effect
This effect wraps your image around a specific point, creating an illusion of a bulging shape that’s through the layer. Essentially, the Bulge effect makes your image appear to sink away from viewers or protrude outwards. The depth and size of the bulge depend on the selected options. There are numerous bulge shapes to choose from, and they include:
- Bulge: Here, low values pinch the image, while high values stretch the image.
- Center: The center shape moves the bulge focal point around the image frame.
- Plateau: This option generates a flat area but without distortion in the middle of the bulge.
- Radius: The radius option allows you to adjust how big or small the distorted area will be.
- Shape: You can change the shape of the bulge with this option.
- Scale X/Y: With the Scale X/Y, you can alter the bulge ratio along the vertical and horizontal axes. You can stretch or pinch the bulge in a specified direction.
- Wrap: Wrap lets you determine the distortion level at the edges of the frame or layer.
Heat Distortion Animation
You can make the Heat distortion effect look more realistic by adding the haze effect or animation. Users can control heat distortion animation movement with the following settings:
- Wind Speed: With this setting, you can alter the intensity and speed of movement along the haze effect direction.
- Noise Speed: This setting changes the speed of the heat noise and the haze effect shape.
- Wind Direction: With the Wind Direction setting, you can adjust the haze effect direction.
Magnify Effect
You can use this effect to zoom in on a certain area of a layer; the Magnify Effect causes the illusion of a lens put over part of an image. You can use this effect to magnify the whole image several times its original size without losing resolution. Essentially, you can change the focal point, size, and shape of this distortion effect.
Insect Vision Effect
This effect produces a honeycomb lens pattern. You can use the Iris Bulge setting to add a bulge effect in the cells. What’s more? You can change the size of each cell.
Witness Protection Effect
The Witness Protection effect allows you to obscure a certain area within the image. You can use this effect to hide serial numbers, watermarks, faces, and text that contains sensitive information.
Mosaic Effect
This effect splits a layer into solid-colored blocks and creates pixelation. You can use the Mosaic effect to conceal text or faces or create the illusion of an image with low resolution. The Vertical Blocks setting allows you to adjust the number of blocks each column has, while the Horizontal Blocks lets you set how many blocks will appear in each row.

How to Create Distortion Effects Using Filmora
Creating distortion effects for your video using Filmora is a walk in the park. You only need to follow the steps below:
• Import your video to Filmora’s Timeline.
• Go to the section of the top toolbar and click on Effects. You’ll see a list of effects on the left sidebar of your screen. Choose the one you want and click on it to apply the effect to your footage.
• You can adjust the effect to suit your preference.
Conclusion
● YouTube video distorted issues can result from several factors, including PC performance, outdated drivers, and installing unsafe third-party on your PC. You can use video distortion to make your videos stand out or conceal images or text in your video. Filmora allows you to create distortion effects in your video with just a few clicks.
Watching videos on YouTube can be an exhilarating experience. But YouTube video distorted issues can be annoying if you do not know how to resolve them. We’ll look at some of the things that can cause YouTube distortion and how to solve these issues.
In this article
01 What Causes YouTube Distortion?
02 How To Solve YouTube Video Distortion?
03 Extra Tips! Create Distortion Effects for Your Video with Filmora
 KoolReport Pro is an advanced solution for creating data reports and dashboards in PHP. Equipped with all extended packages , KoolReport Pro is able to connect to various datasources, perform advanced data analysis, construct stunning charts and graphs and export your beautiful work to PDF, Excel, JPG or other formats. Plus, it includes powerful built-in reports such as pivot report and drill-down report which will save your time in building ones.
 It will help you to write dynamic data reports easily, to construct intuitive dashboards or to build a whole business intelligence cockpit.
KoolReport Pro package goes with Full Source Code, Royal Free, ONE (1) Year Priority Support, ONE (1) Year Free Upgrade and 30-Days Money Back Guarantee.
Developer License allows Single Developer to create Unlimited Reports, deploy on Unlimited Servers and able deliver the work to Unlimited Clients.
What Causes YouTube Distortion?
Several things can cause Youtube social distortion. They include:

1. Poor Hardware Performance
Experiencing YouTube videos with green and distorted issues can be annoying. It can be a result of your computer having poor hardware performance. When using your computer, there will always come a point when it will behave unexpectedly and become slow. Running multiple applications on your computer can affect its speed because each application has less memory to use. The more applications run simultaneously, the slower your computer will be.
Viruses, spyware, and malware can also monitor your activity and take control of your PC, creating all kinds of complications that reduce performance.
2. Outdated Graphics Drivers
Your graphics card type can also determine the performance of your computer. Graphics cards are used to perform nonvisual computations, meaning they are crucial for the general performance of your PC.
Having outdated Graphics drivers on your PC can result in many problems, including YouTube video distortion. You need a robust graphics card, a suitable driver, and GPU to have stunning graphics on your PC.
What’s more? You have to keep your graphics updated, or your computer won’t support HD visuals. Therefore, if you are experiencing YouTube social distortion, install the latest GPU driver on your PC.
3. Unsafe Third-Party Software
There are tons of helpful and inexpensive programs on the internet, and it can be tempting to install them. But there are numerous reasons you might want to think twice before downloading and installing one. They can result in YouTube videos green and distorted problems.
In addition to third-party programs giving leeway to hackers and containing weaknesses, this software comes with other security risks. The software could have unmaintained codes, which can lead to failure to do what it’s supposed to. Its functionality and performance will be obstructed.
4. Outdated Flash
If you’ve installed an old version of Flash, it might not work well with your browser or YouTube. In turn, this can lead to YouTube videos being green and distorted.
5. Setting Video Resolution High
Setting the video resolution higher than what your video card or monitor supports can result in YouTube video distortion. If a 4K YouTube video is distorted, this means your PC is not advanced enough to do so.

How To Solve YouTube Video Distortion?
You might have noticed that the video is blurred while watching it. You shot the video with a camera with a built-in lens with a wide view, and it cannot focus perfectly. Some videos are also shot in low resolution, which is blurry. Sometimes there is also compression, which means you can’t see all the picture details. Here are ways to solve YouTube video distortion.
- Change Resolution
Resolutions measure the number of pixels used to represent an image. The higher the resolution, the more details you can see in a video. In most cases, videos are shot in 720 or 1080 pixels. High-resolution videos can also help you see small details that are not visible in low-resolution videos.
- Reinstall Flash Player
Many people use the latest version of Adobe Flash Player, and even though it is the most stable version, some people cannot see videos on YouTube; this may be because of the Flash Player. If you have updated your browser to the latest version, you will also need to update your Flash Player.
- Update Video Drivers
The best way to solve YouTube video distortion is to update your video drivers. Outdated video card drivers could be having bugs that cause your YouTube video distorted. Depending on your card’s brand, download the updates to your computer’s video card.
Disable Hardware Acceleration
To solve YouTube social distortion, you may need to disable hardware acceleration. To do so, you need to go to the YouTube settings of that particular video. On the enable hardware acceleration tab, click close. Next, refresh your page and watch the video. Your video card needs replacing if this fixes the problem. In the meantime, you can watch YouTube videos without hardware acceleration.
Extra Tips! Create Distortion Effects for Your Video with Filmora
As one of the most popular video editing software on the market, Filmora comes with a distortion tool with multiple effects that can make your YouTube video stand out and get more views. You can use the tool to change the behavior and shape of a layer. Let’s take a look at some of these distortion effects.
Heat Distortion Effect
The Heat distortion effect simulates realistic heat waves, and it features controls for amount, speed, direction, intensity, and much more.
- Distort Single Axis: This option will apply the heat distortion effect in a single direction. You can also specify the angle with the Distortion Rotation setting.
- Distortion Rotation: With this setting, you can change the direction of the distortion.
- Scale: The Scale option allows you to set the scale of the distortion.
- Diffusion Strength: You can adjust the blur intensity with this setting.
- Diffusion Bias: High values of the Diffusion Bias makes the blur more prevalent.
- Distortion: This option allows you to set the heat distortion strength on a layer.
Bulge Effect
This effect wraps your image around a specific point, creating an illusion of a bulging shape that’s through the layer. Essentially, the Bulge effect makes your image appear to sink away from viewers or protrude outwards. The depth and size of the bulge depend on the selected options. There are numerous bulge shapes to choose from, and they include:
- Bulge: Here, low values pinch the image, while high values stretch the image.
- Center: The center shape moves the bulge focal point around the image frame.
- Plateau: This option generates a flat area but without distortion in the middle of the bulge.
- Radius: The radius option allows you to adjust how big or small the distorted area will be.
- Shape: You can change the shape of the bulge with this option.
- Scale X/Y: With the Scale X/Y, you can alter the bulge ratio along the vertical and horizontal axes. You can stretch or pinch the bulge in a specified direction.
- Wrap: Wrap lets you determine the distortion level at the edges of the frame or layer.
Heat Distortion Animation
You can make the Heat distortion effect look more realistic by adding the haze effect or animation. Users can control heat distortion animation movement with the following settings:
- Wind Speed: With this setting, you can alter the intensity and speed of movement along the haze effect direction.
- Noise Speed: This setting changes the speed of the heat noise and the haze effect shape.
- Wind Direction: With the Wind Direction setting, you can adjust the haze effect direction.
Magnify Effect
You can use this effect to zoom in on a certain area of a layer; the Magnify Effect causes the illusion of a lens put over part of an image. You can use this effect to magnify the whole image several times its original size without losing resolution. Essentially, you can change the focal point, size, and shape of this distortion effect.
Insect Vision Effect
This effect produces a honeycomb lens pattern. You can use the Iris Bulge setting to add a bulge effect in the cells. What’s more? You can change the size of each cell.
Witness Protection Effect
The Witness Protection effect allows you to obscure a certain area within the image. You can use this effect to hide serial numbers, watermarks, faces, and text that contains sensitive information.
Mosaic Effect
This effect splits a layer into solid-colored blocks and creates pixelation. You can use the Mosaic effect to conceal text or faces or create the illusion of an image with low resolution. The Vertical Blocks setting allows you to adjust the number of blocks each column has, while the Horizontal Blocks lets you set how many blocks will appear in each row.
How to Create Distortion Effects Using Filmora
Creating distortion effects for your video using Filmora is a walk in the park. You only need to follow the steps below:
• Import your video to Filmora’s Timeline.
• Go to the section of the top toolbar and click on Effects. You’ll see a list of effects on the left sidebar of your screen. Choose the one you want and click on it to apply the effect to your footage.
• You can adjust the effect to suit your preference.

Conclusion
● YouTube video distorted issues can result from several factors, including PC performance, outdated drivers, and installing unsafe third-party on your PC. You can use video distortion to make your videos stand out or conceal images or text in your video. Filmora allows you to create distortion effects in your video with just a few clicks.
- Title: Eliminating Blurry Visuals From Streamed YouTube Content
- Author: Joseph
- Created at : 2024-07-27 09:34:08
- Updated at : 2024-07-28 09:34:08
- Link: https://extra-tips.techidaily.com/eliminating-blurry-visuals-from-streamed-youtube-content/
- License: This work is licensed under CC BY-NC-SA 4.0.